⇦ Back to: Branch | ⇧ Overview | ⇨ Next: Push
Solve the issue, commit-by-commit
<aside>
📚 A commit is a snapshot of all the files in the repository.
Commits are listed in the log
</aside>
Approach
- Make a small change, making an improvement.
- Commit it (see below for details for your Git Client):
- Add the files which you want to update
- Add a summary of 50 characters or fewer, e.g.
- “fix: remove warning about citations in Characteristics section” or
- “feat: add new list of maintainers in overview”. (“feat” is short for “feature”. See Advanced Commit Messages for more details.)
- (Optionally) add a more detailed description.
- Repeat until you’ve made the minimum number of commits which make sense for someone else to review and merge into the repository. This will be your “pull request.”
<aside>
💡 Commit pro-tips:
- A good commit does exactly one thing.
- Making several tiny commits each couple of minutes is normal (and often good).
- Try to make commits which retain the internal consistency of the document, e.g. replacing a noun with a synonym throughout a paragraph or document.
</aside>
Using GitHub Desktop
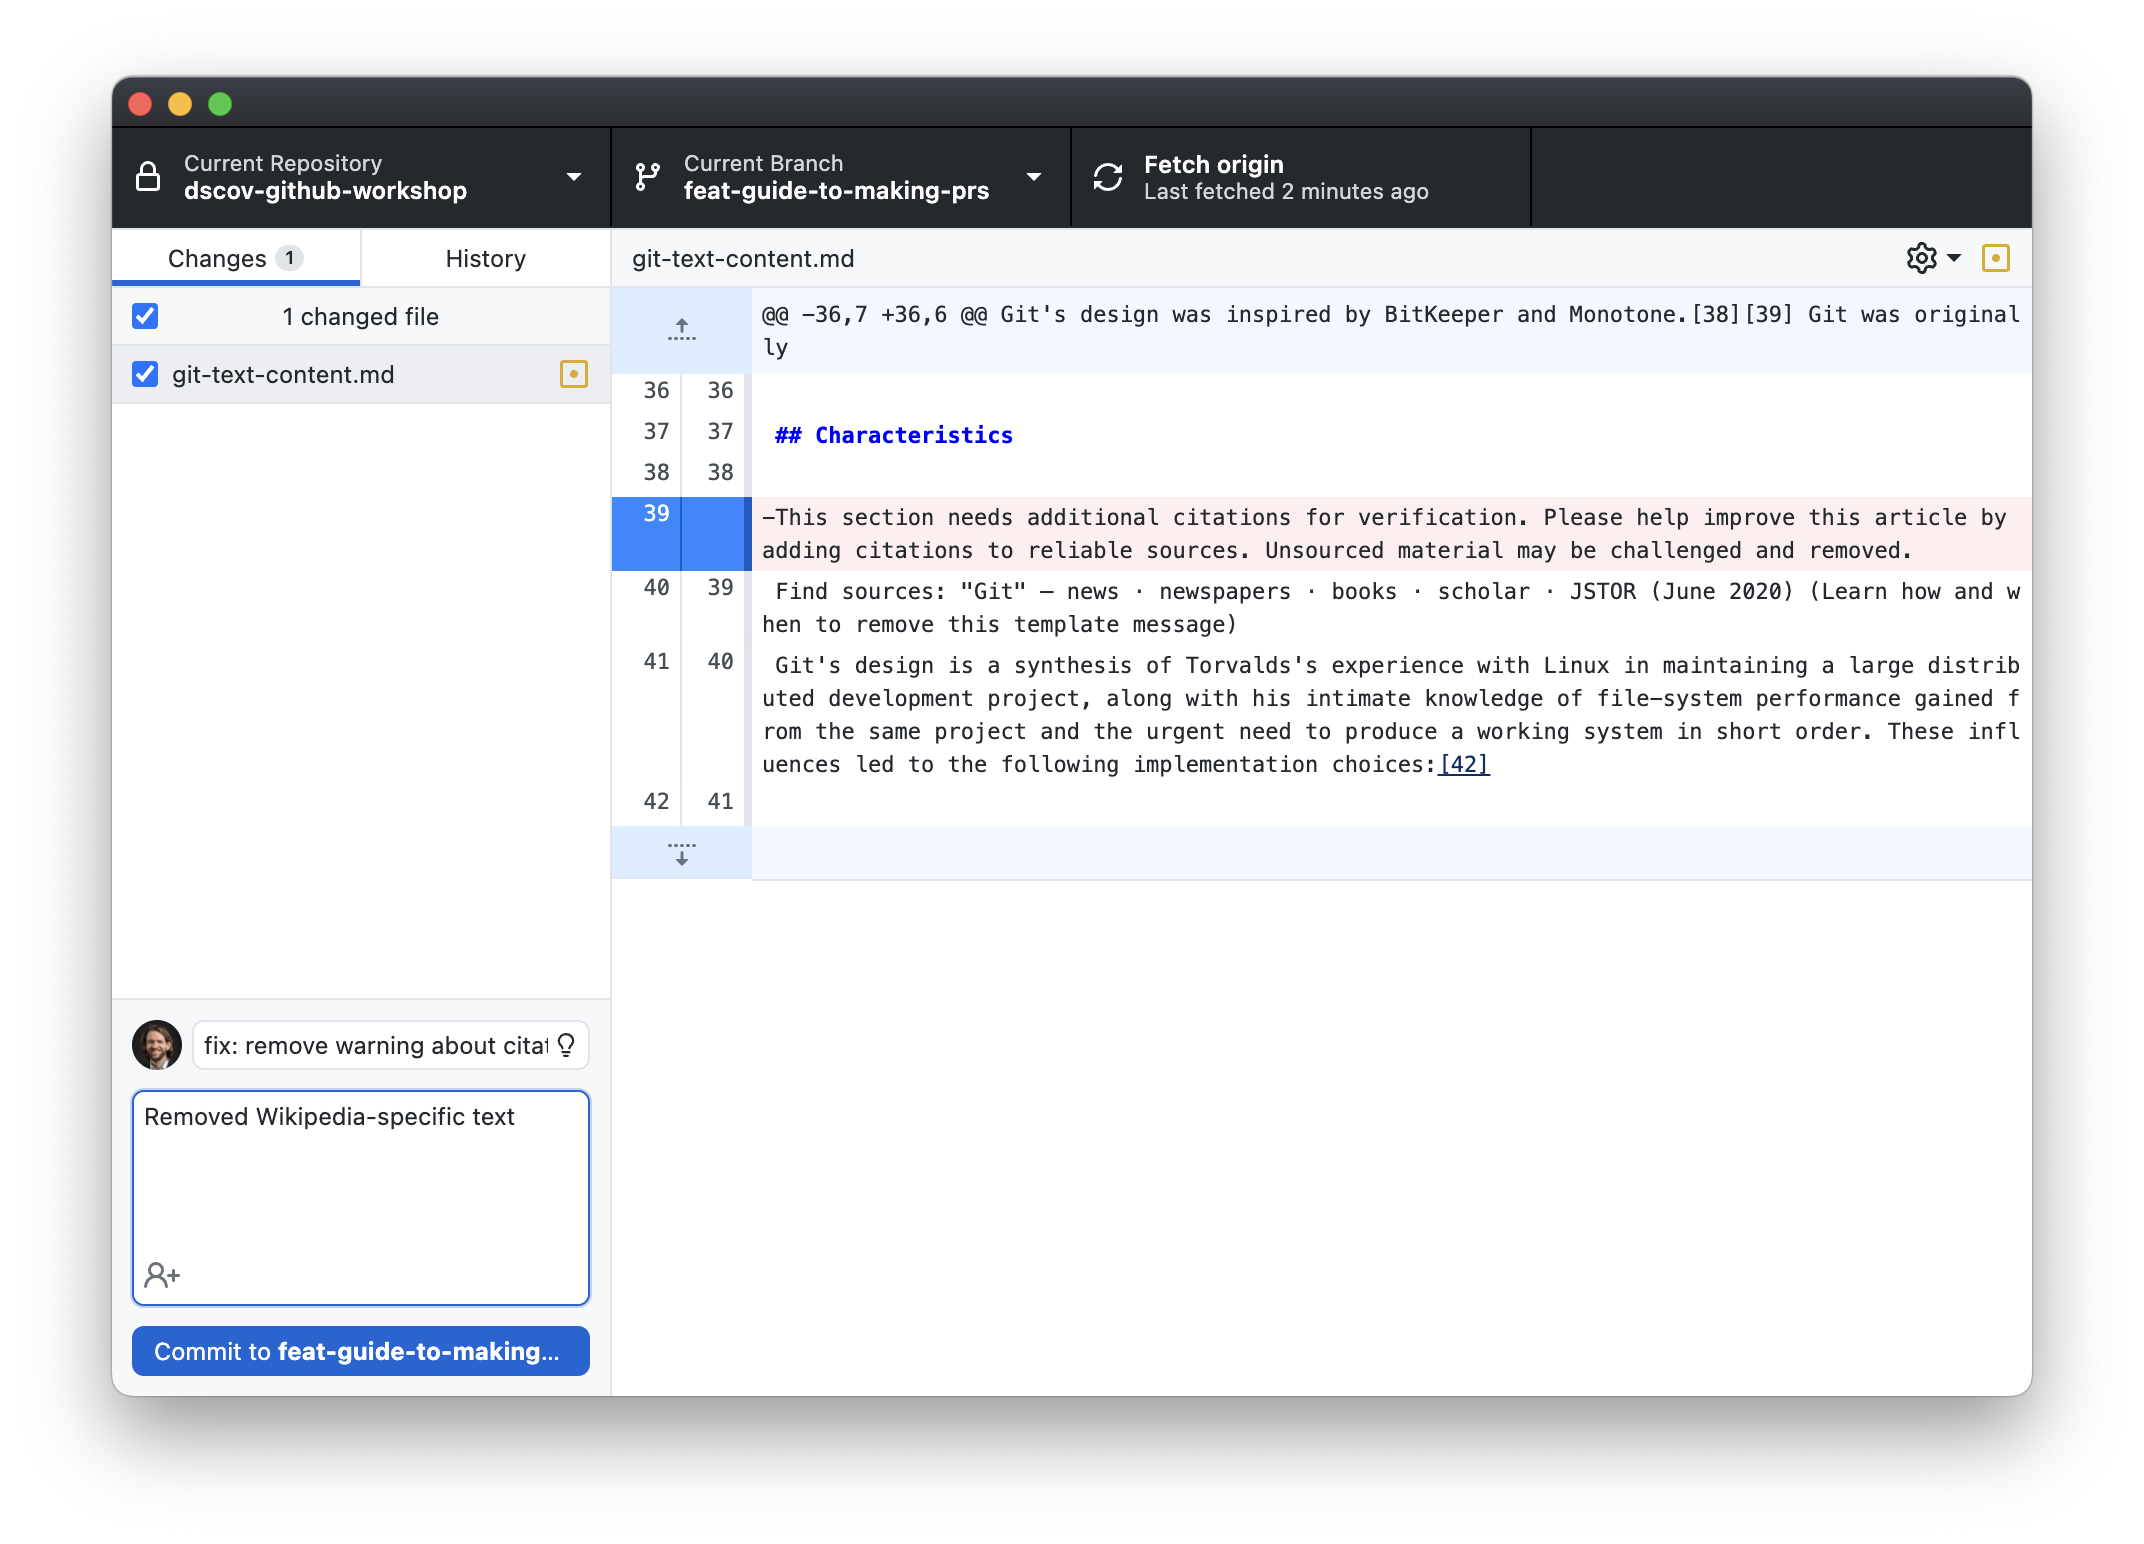
GitHub Desktop automatically recognizes that you’ve made a changes to the files.

Add your commit summary and optional description in the field at the bottom left, and then press “commit to 12-your-branch-name-here”.
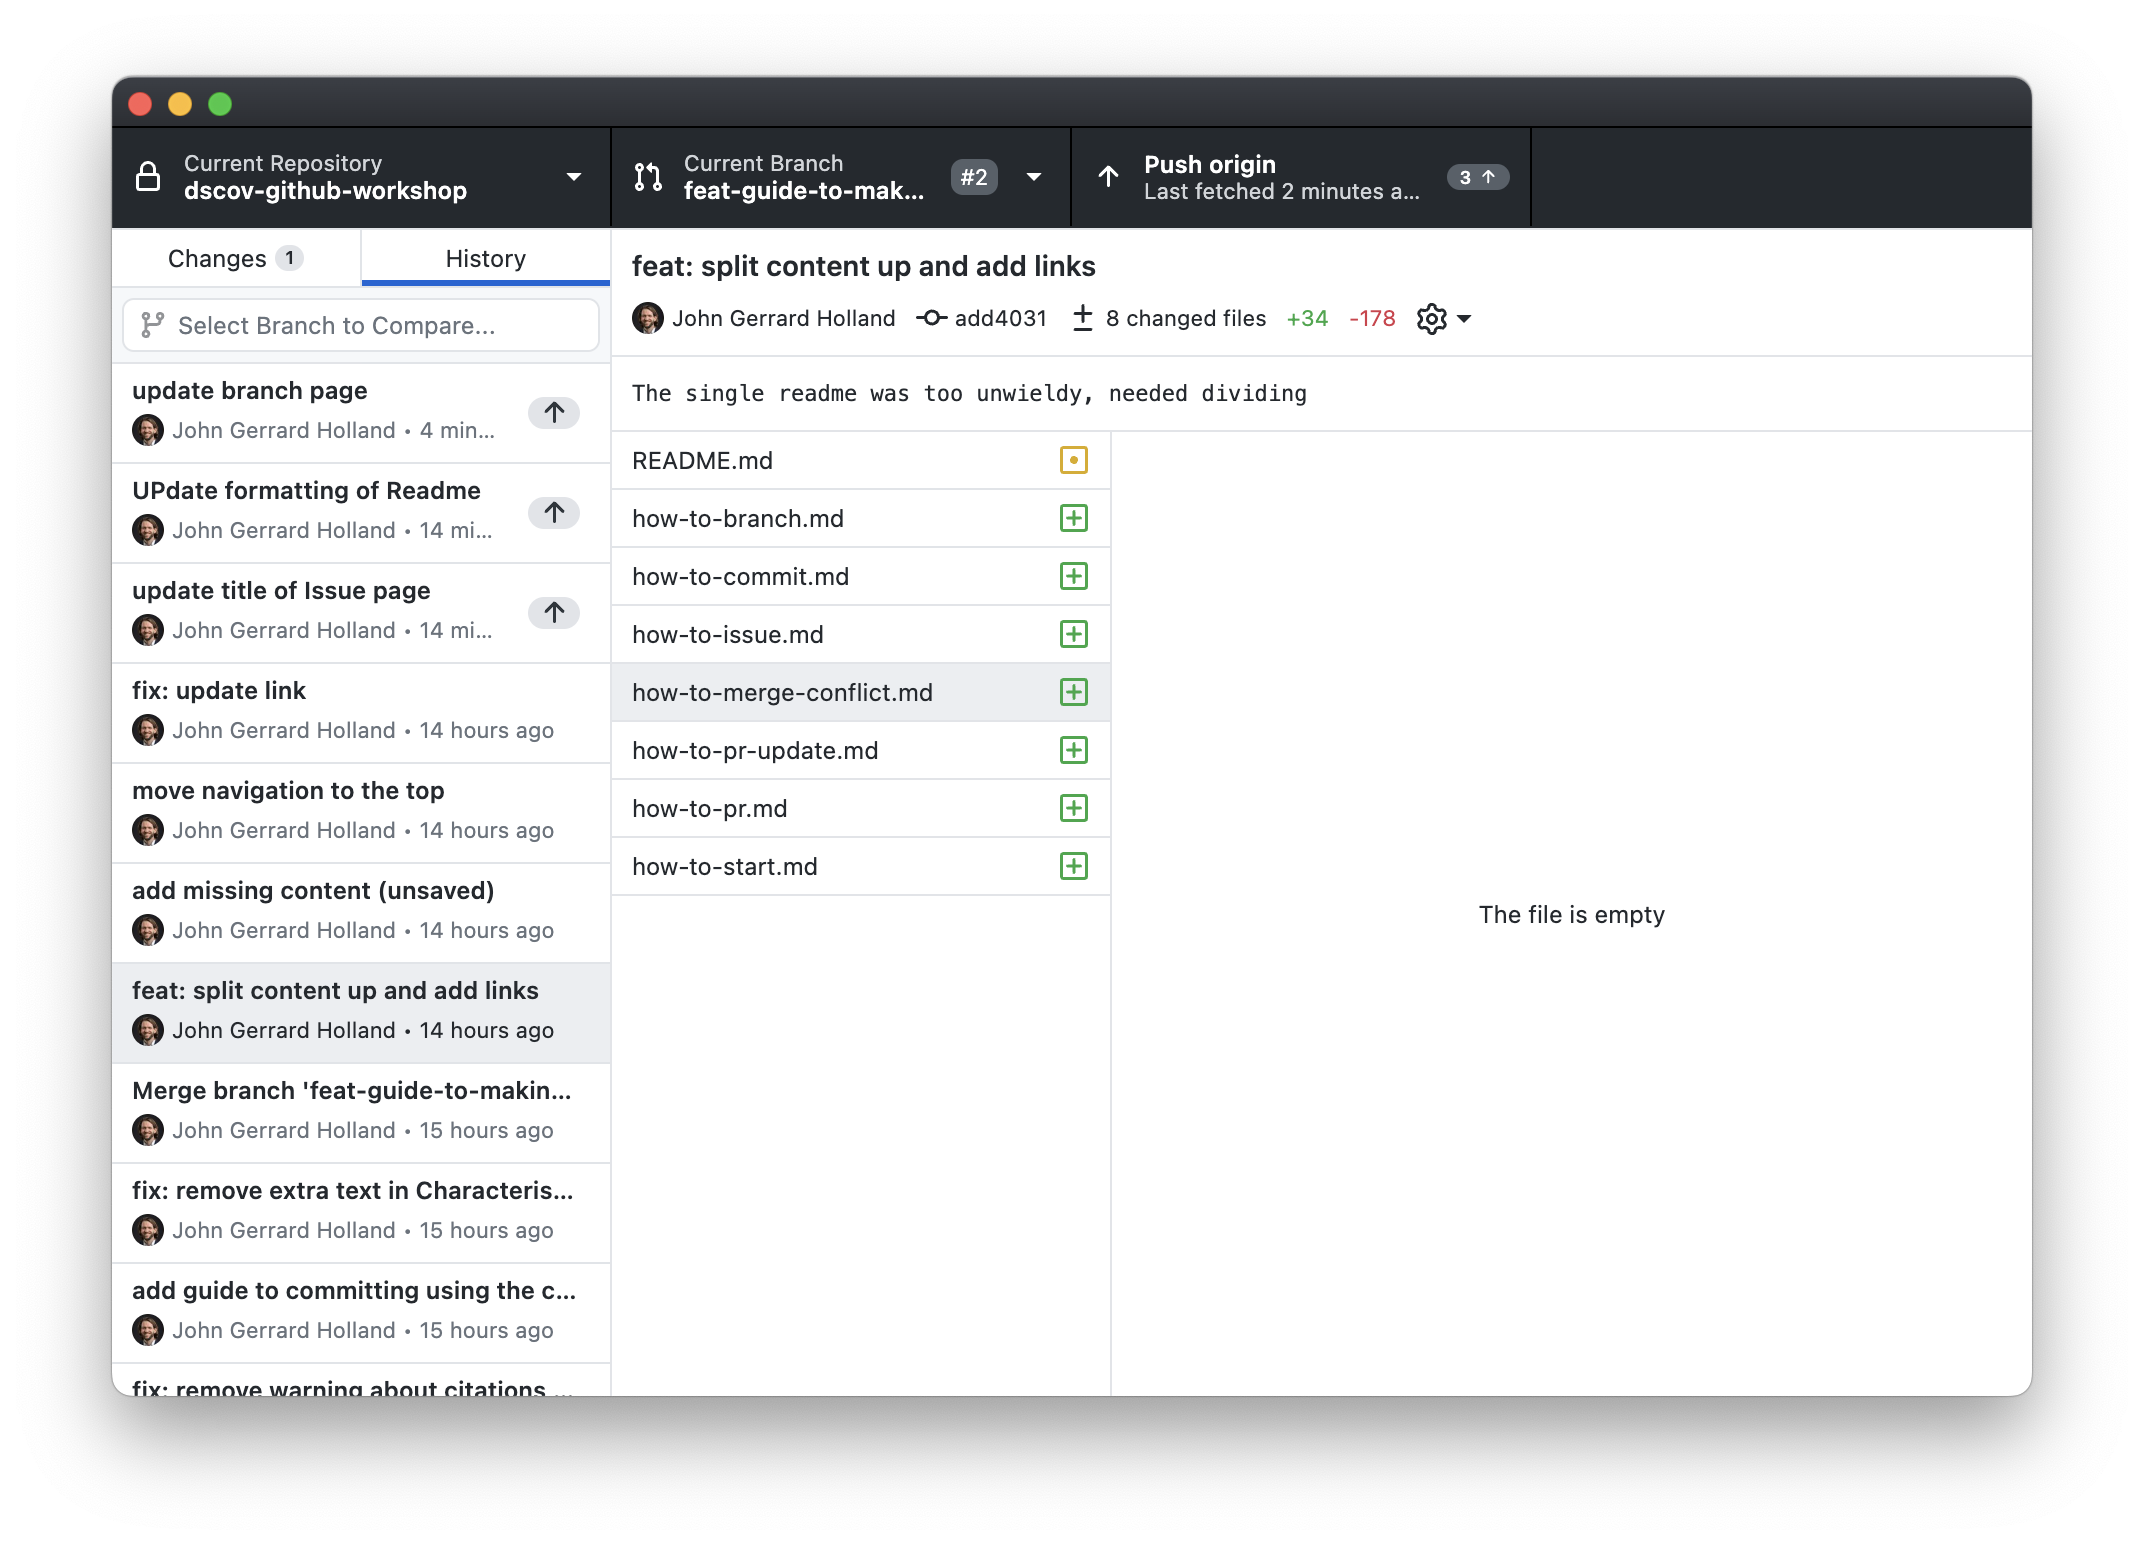
The commit will appear in the log, shown on the “history” tab.

Using git on the command line
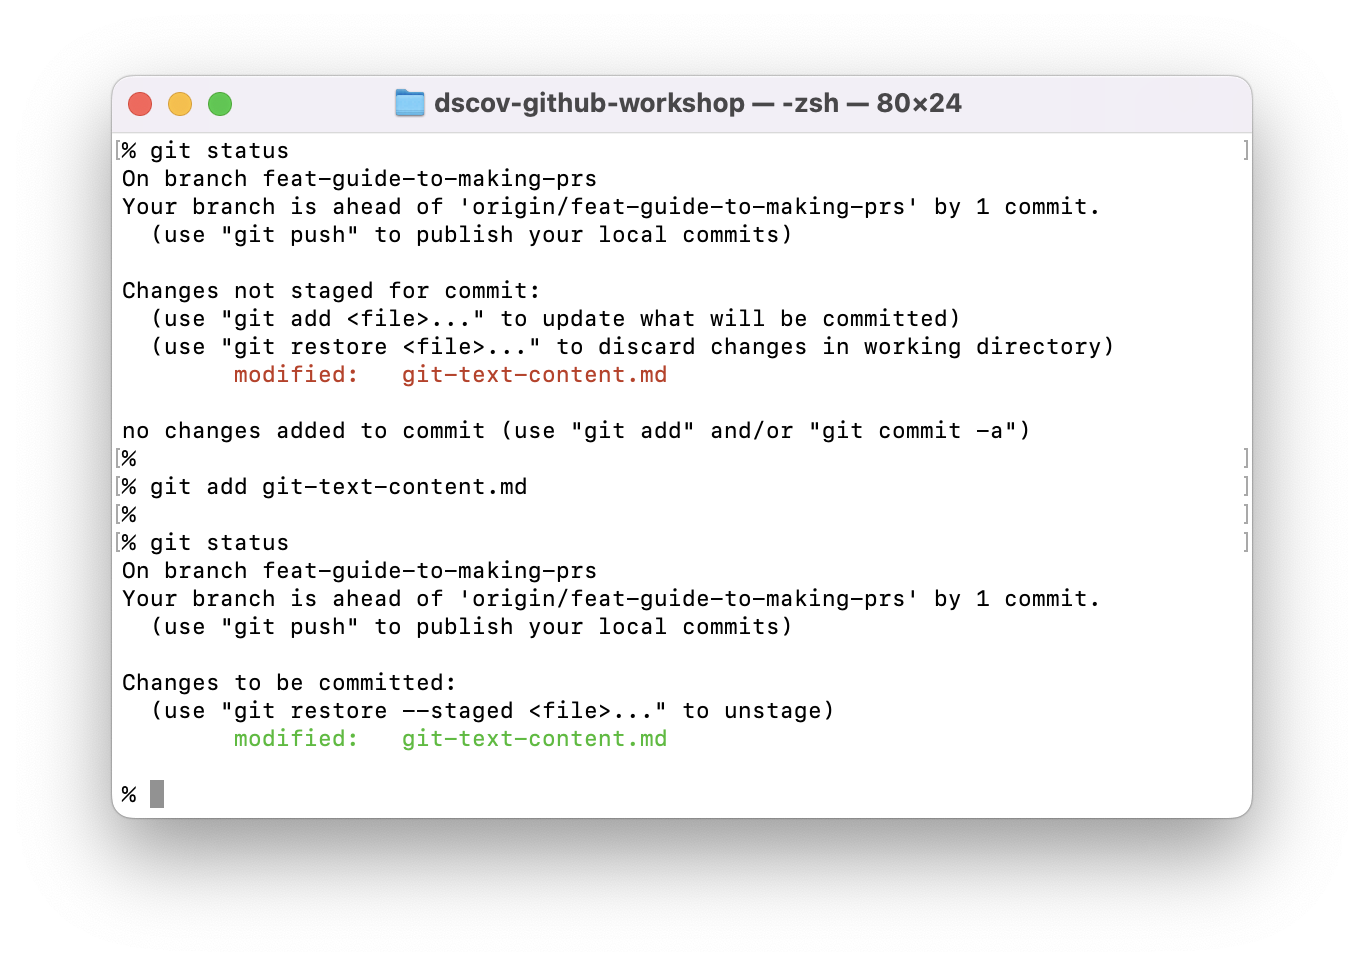
Git needs to be told which of your files have been modified. “Stage” these files using the command git add <filename>, e.g.
git add git-text-content.md
To see a list of modified files and whether they are staged (i.e. going to be included in the next commit), run:
git status


